Streamlined three-tier loyalty program where every member enjoys the same high-quality rewards, with benefits escalating at each tier.
Simple yet effective, this program stands as the best deal for Eloking's boosting services, ensuring maximum value and satisfaction for all our users.
Cashback on all Eloking boosts (3%, 5%, 7%)
Discounts for all Eloking boosts (5%, 10%, 15%)
Discount for a friend 🤗
Free daily lootbox spin with industry-leading rewards
Member exclusive season and event offers
Best Viper Lineups and Setups for Breeze
j
Anthony King
Gamer
03 Feb 2026
Updated On
In Valorant, the strategic dynamics of gameplay heavily rely on thoughtful agent choices and the precise utilization of their abilities. On the Breeze map, Viper, armed with her toxic abilities, emerges as a pivotal force. Nevertheless, employing her toxic arsenal without proper knowledge of specific lineups and setups can diminish its effectiveness. Therefore, understanding key strategies becomes imperative.
Today, we'll explore various lineups and setups tailored for the Breeze map that enhance Viper's impact in Valorant. These strategic approaches aim to unlock the full potential of the agent, contributing significantly to both offensive and defensive maneuvers. To ensure you have at least one lineup for any occasion we're giving two lineups for both her poison cloud and toxic screen abilities.
If you're eager to master the best Viper lineups for Breeze, read on. For those seeking a rapid acquisition of these setups, we highly recommend engaging a professional-level coach from Eloking. Use the code "BoostToday" to avail of an exceptional 20% discount and expedite your learning process.
Poison Cloud Lineups
Struggling to win? Bad teammates?
Purchase a game with one of our PRO players.
One game
Average wait time <30 minutes
$4.00
$3.32 per game
Two games
Average wait time <30 minutes
$8.00
$3.00 per game
Three games
Average wait time <30 minutes
$12.00
$2.50 per game
B Default Plant Lineup
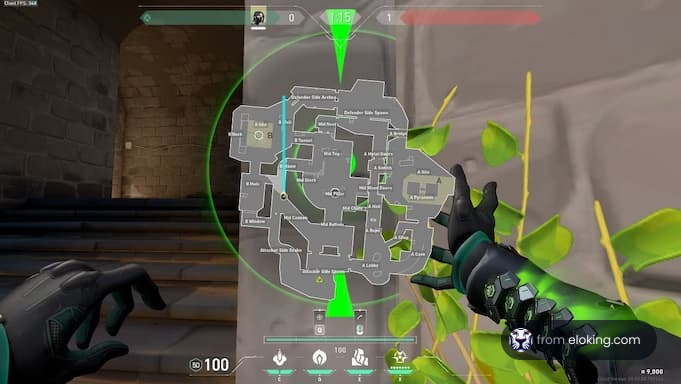
Executing a successful attack on Breeze's B site requires careful coordination and strategic use of Viper's Poison Cloud. The B Default Plant Lineup offers a tactical advantage by providing a smoke cover on the default B plant site, creating opportunities for a secure spike plant.
Steps:
Position yourself in B Elbow, preparing for the upcoming execution.
Identify the specific corner mentioned in the lineup, ensuring accuracy in placement.
Aim up and line up the Poison Cloud icon near the flower, adjusting your crosshair precisely.
Execute a jump-shoot to deploy the Poison Cloud at the intended location.
This Poison Cloud lineup involves a precise throw that results in the gas emitter landing on the default B plant site. The smoke cover generated by the Poison Cloud offers a strategic advantage by obscuring vision and creating confusion for defenders. This allows your team to safely plant the spike and control the subsequent engagement, increasing the chances of a successful round.
A Default Plant Lineup
Attacking A site on Breeze requires creative Poison Cloud usage to disrupt defenders and secure a successful plant. The A Default Plant Lineup utilizes Viper's Poison Cloud in conjunction with other abilities for maximum impact, making it a versatile strategy for A site assaults.
Steps:
Navigate to the entrance in front of the pyramids when attacking A site.
Deploy the Poison Cloud at the entrance, obscuring vision for defenders.
Combine the Poison Cloud with Snake Bite to inflict additional damage on enemies.
Optionally, place a Viper wall beside the Poison Cloud for added protection and control.
By deploying the Poison Cloud at the entrance of A site, you create an effective smoke cover that disrupts defender visibility and hampers their ability to counter-attack. Combining the Poison Cloud with Snake Bite introduces an additional layer of threat, making it challenging for enemies to defuse the spike.
The optional addition of a Viper wall enhances defensive capabilities, providing a well-rounded approach to attacking A site on Breeze. Mastering this lineup can turn the tide in favor of your team during critical rounds.
Toxic Screen Lineups
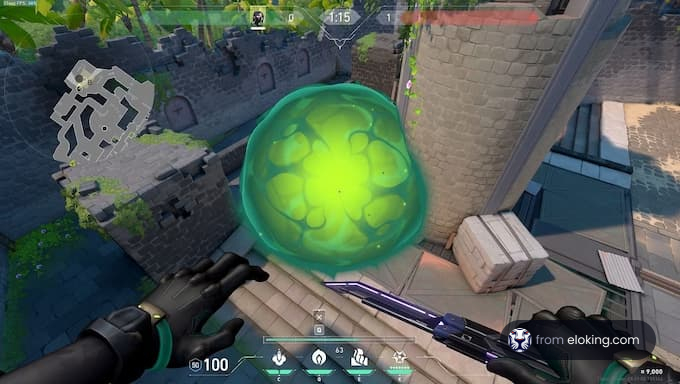
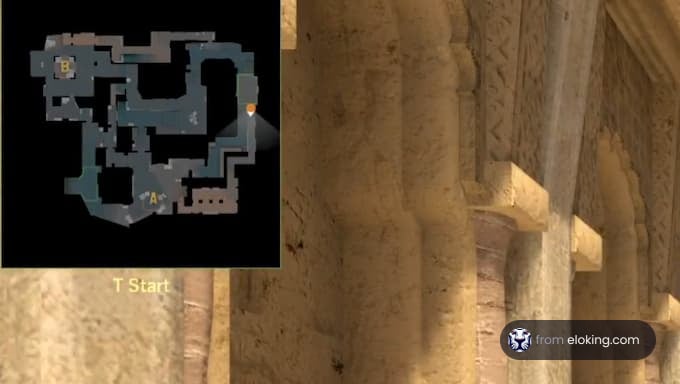
B Site Toxic Screen Lineup
Viper's Toxic Screen proves to be a game-changer on Breeze, offering strategic control and cover during attacks on B Site. Mastering the Toxic Screen lineup for B Site is crucial for gaining the upper hand and securing successful bomb plants.
Steps:
Position yourself in B Lobby, preparing for the assault on B Site.
Aim your crosshair directly at the designated wall, aligning it with the intended trajectory of the Toxic Screen.
Execute the Toxic Screen ability by firing, deploying a long line of gas emitters that will transform into a formidable Viper wall.
The B Site Toxic Screen lineup is designed to provide optimal cover for attackers advancing towards B Site. By positioning yourself in B Lobby, you gain a centralized location from which to deploy the Toxic Screen.
The resulting Viper wall precisely covers the B default main entrance, obstructing the line of sight for defenders and providing a tactical advantage for attackers. This lineup is effective for controlling engagements, isolating opponents, and securing strategic positions during the assault on B Site.
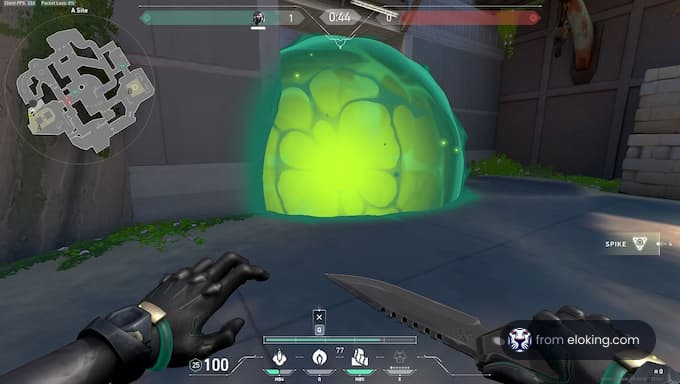
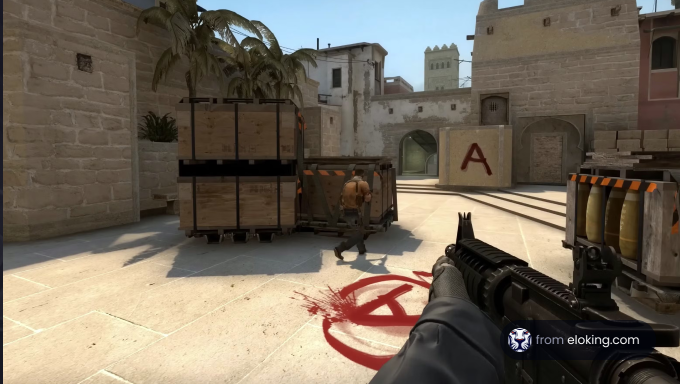
A Site Pyramid Toxic Screen Lineup
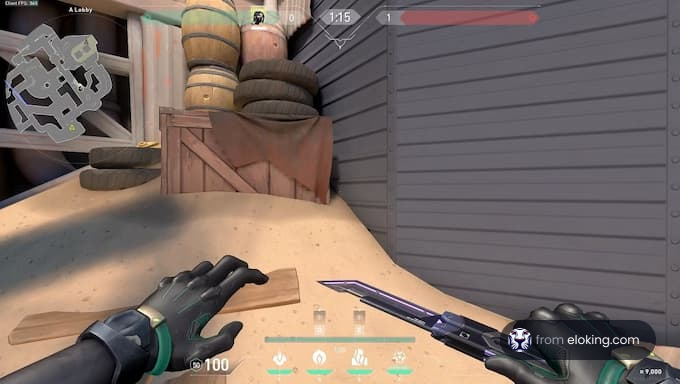
Attacking Site A on Breeze demands strategic control and well-placed barriers. Viper's Toxic Screen can be a game-changer when deployed to cover A Pyramid. Mastering this lineup enhances the team's defensive capabilities and disrupts the opponent's plans.
Steps:
Move to the corner between A Hall and A Shop, positioning yourself for the attack on A Site.
Climb over the nearby boxes to gain an elevated perspective.
Aim slightly higher, aligning your crosshair with the intended trajectory of the Toxic Screen.
Execute the Toxic Screen ability by firing, creating a tall wall of toxic gas that covers A Pyramid effectively.
The A Site Pyramid Toxic Screen lineup is crafted to fortify your team's defense when attacking A Site. By positioning yourself in the corner between A Hall and A Shop, you gain a vantage point that allows for precise deployment of the Toxic Screen. The resulting Viper wall covers A Pyramid, providing cover from three different directions.
This strategic advantage not only obstructs the enemy's line of sight but also makes it challenging for opponents to breach the defense. Mastering this Toxic Screen lineup is essential for controlling A Site engagements and securing victories on Breeze.
FAQs
Position yourself in B Elbow. Aim at the corner and align the Poison Cloud icon near the flower. Use a jump-shoot to land the smoke on the default plant site.
Go to the entrance in front of A pyramids. Deploy Poison Cloud, then Snake Bite. Optionally, add a Viper wall beside the Poison Cloud for extra protection.
Stand in B Lobby and aim at the designated wall. Fire the Toxic Screen to create a wall that covers the B default main entrance, blocking vision for defenders.
Go to the corner between A Hall and A Shop and climb the boxes. Aim slightly higher to align the crosshair and fire the Toxic Screen to cover A Pyramid.
What’s next?
Take your Valorant gameplay to the next level and climb the ranks with ease - buy Valorant boost now!
Purchase Valorant Boost
and start playing at the rank you deserve!