Streamlined three-tier loyalty program where every member enjoys the same high-quality rewards, with benefits escalating at each tier.
Simple yet effective, this program stands as the best deal for Eloking's boosting services, ensuring maximum value and satisfaction for all our users.
Cashback on all Eloking boosts (3%, 5%, 7%)
Discounts for all Eloking boosts (5%, 10%, 15%)
Discount for a friend 🤗
Free daily lootbox spin with industry-leading rewards
Member exclusive season and event offers
Best Sage Split Lineups
p
Jack Willa
Gamer
03 Feb 2026
Updated On
Sage proves herself as a top-tier agent renowned for her strategic utility deployment across various maps, with a special emphasis on the crucial role played by her Barrier Orbs. However, randomly placing these orbs might not produce the desired effects. Hence, comprehending the optimal Sage wall lineups becomes imperative, especially when navigating the unique challenges of the Split map.
In our present discussion, the spotlight turns to Split, a map with its own set of intricacies distinct from Fracture. Having previously delved into Fracture's dynamics, it's essential to recognize Sage's significance on Split. Sage's ability to shape engagements and offer crucial support positions her as an indispensable asset in determining round outcomes on this particular map.
For those eager to glean insights into the most impactful Sage wall lineups on Split, focusing on both the A and B bombsites is essential. Mastery of these lineups plays a pivotal role in maximizing Sage's influence on the battlefield. Enhance your skills further by consulting with a professional Valorant coach from Eloking, and take advantage of a 20% discount using the code "BoostToday" when utilizing their services.
Sage's Usefulness on Split
Struggling to win? Bad teammates?
Purchase a game with one of our PRO players.
One game
Average wait time <30 minutes
$4.00
$3.32 per game
Two games
Average wait time <30 minutes
$8.00
$3.00 per game
Three games
Average wait time <30 minutes
$12.00
$2.50 per game
Sage stands as a linchpin of strategic prowess on the dynamic terrain of Split. Her versatile abilities, including healing and crowd control, make her an invaluable asset to any team navigating the multi-level complexities of this map. As a matter of face, Sage is also invaluable in maps like Pearl, Ascent, and Fracture.
Split's vertical layout often demands precise positioning and intelligent plays, and Sage excels at creating opportunities for her team. By strategically placing walls to impede enemy advances, controlling key chokepoints, and offering healing support, Sage significantly influences the flow of engagements on both A and B bombsites.
In a map where every inch can impact the outcome, Sage's utility transforms her into a cornerstone of defensive stability and offensive execution, elevating her team's chances of success on the challenging Split landscape. Of course, you'll need to learn how to properly use Sage's abilities which a professional Valorant coach can do for you with 20% off if you use the code "BoostToday".
Sage Walls on Split A Bombsite
A Main Wall
The A Main Wall is a fundamental Sage lineup on Split, designed to control the flow of attackers entering the A bombsite. This strategic placement not only hinders enemy advancements but also provides key advantages for the defending team. To pull off this wall lineup:
Begin by positioning yourself at A site, near the entrance to A Main.
Use Sage's barrier ability to create a vertical wall that spans the width of A Main. The wall should be placed at the entrance, obstructing the direct path for attackers.
The A Main Wall serves a dual purpose. Firstly, it acts as a deterrent for aggressive pushes from the attackers, slowing down their progress and disrupting their planned execution. Secondly, by strategically placing the wall, Sage gains control over the A Main orb, contributing towards her ultimate charge or providing a teammate with a tactical advantage.
A Site Execute Screens Wall
The A Site Execute Screens Wall is a crucial lineup that impacts retake scenarios on Split's A bombsite. By effectively blocking access to screens, Sage allows her team to concentrate on other critical areas during retakes.
To pull off this wall lineup:
Position yourself at a vantage point near A site, with a clear line of sight to Screens.
Deploy Sage's wall to obstruct the entry to Screens, preventing defenders from utilizing this route during retake attempts.
Blocking Screens ensures that defenders have limited access points during retake situations, giving the attacking team a strategic advantage. This lineup allows Sage's teammates to focus on defending other angles and positions without the constant threat from Screens. It's a proactive move to control the retake dynamics and increase the likelihood of a successful defense.
Sage Walls on Split B Bombsite
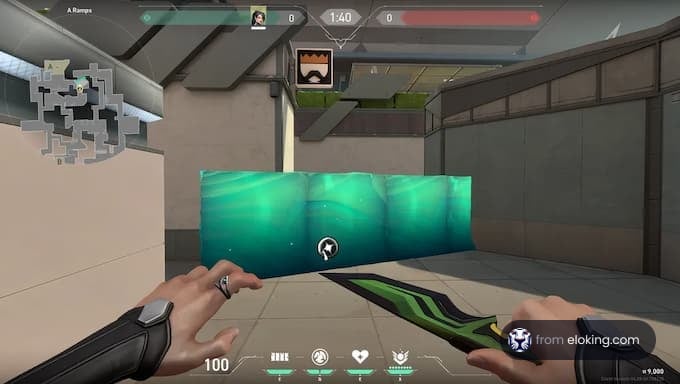
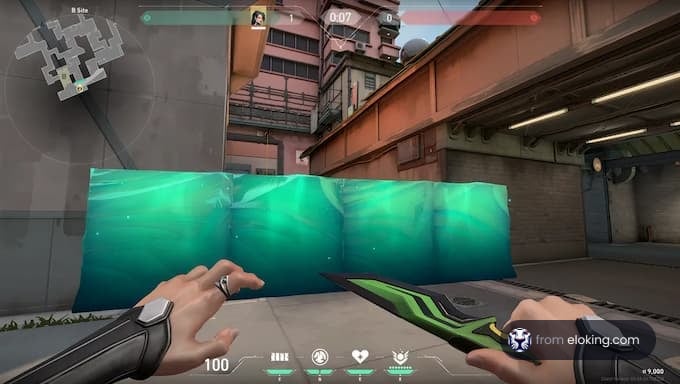
1. Crossing into B Site Wall
The Crossing into B Site Wall is a fundamental Sage lineup on Split, designed to provide a secure passage for Sage and her teammates into the B site. This strategic wall not only ensures safe entry but also disrupts the defender's line of sight, creating opportunities for a successful attack.
To pull off this wall lineup:
Stand near the entrance of B main or mid, close to the wall on your right side.
Aim your crosshair at the edge of the building on your left, just above head level.
Use Sage's barrier ability to place the wall, making sure it extends from the building on your left to the wall on your right.
The Crossing into B Site Wall serves a dual purpose. Firstly, it obscures the vision of defenders holding angles from heaven, making it difficult for them to spot attackers crossing into the B site. This is particularly effective when the defending team has a strong presence in the elevated positions.
Moreover, the wall minimizes the risk of taking damage from enemies in heaven, allowing Sage and her team to safely transition onto the B site. Once deployed, this wall can be a game-changer, setting the stage for a well-coordinated assault or post-plant defense.
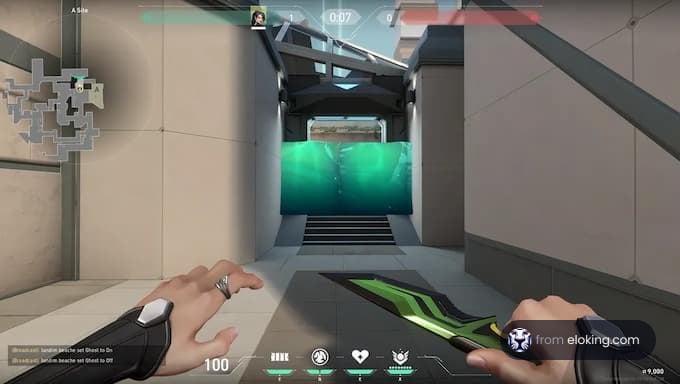
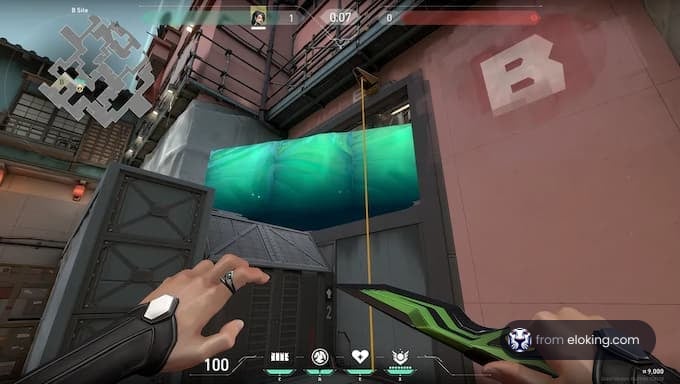
2. B Tower Wall
The B Tower Wall is a strategic lineup that focuses on blocking the exit from B tower, a key position for defenders looking to mount a retake. This wall placement not only hinders the defenders but also enables the attacking team to establish advantageous post-plant positions.
To pull off this wall lineup:
Stand near the entrance of B tower, close to the wall on your right.
Aim your crosshair at the top of the tower, just above the ledge.
Use Sage's barrier ability to place the wall, ensuring it completely covers the exit from B tower.
The B Tower Wall disrupts the defenders' ability to quickly exit B tower, forcing them to either break the wall or find alternative routes. This delay provides precious seconds for the attackers to set up post-plant defenses and anticipate the defenders' movements.
FAQs
Sage excels on Split due to her healing, crowd control, and wall utility. She can control chokepoints and impede enemy advances, making her a cornerstone of both defense and offense.
Position yourself at A site near A Main. Use Sage's wall to create a vertical barrier spanning the width of A Main, obstructing the direct path for attackers. This slows pushes and controls the A Main orb.
The Crossing into B Site Wall provides a secure passage into B site. It obscures the vision of defenders holding angles from heaven and makes it difficult for them to spot attackers crossing into the B site.
What’s next?
Take your Valorant gameplay to the next level and climb the ranks with ease - buy Valorant boost now!
Purchase Valorant Boost
and start playing at the rank you deserve!