Streamlined three-tier loyalty program where every member enjoys the same high-quality rewards, with benefits escalating at each tier.
Simple yet effective, this program stands as the best deal for Eloking's boosting services, ensuring maximum value and satisfaction for all our users.
Cashback on all Eloking boosts (3%, 5%, 7%)
Discounts for all Eloking boosts (5%, 10%, 15%)
Discount for a friend 🤗
Free daily lootbox spin with industry-leading rewards
Member exclusive season and event offers
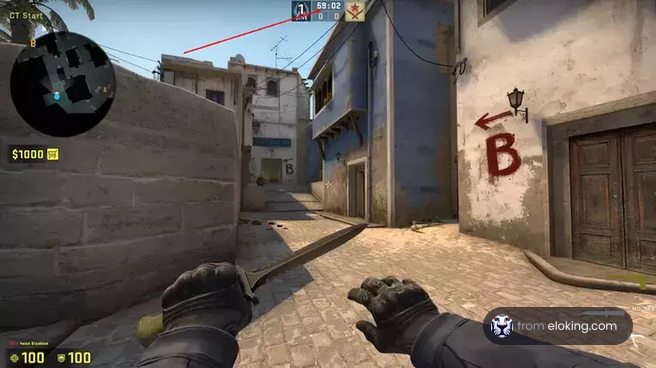
How to Play Overwatch 2 on Steam Deck
j
Anthony King
Gamer
02 May 2024
Updated On
Although Valve's Steam Deck is an amazing piece of technology that allows players to play rather heavy games on the go, it does have some faults. For example, playing games like Overwatch 2 which isn't on Steam is impossible right? Not at all! You only need to know how to download and install the game using other means.
To download Battle.net you first have to boot your Steam Deck into desktop mode. Then, simply go to your browser and download Battle.net as you would regularly from the official website. Once it's downloaded, add Battle.net to Steam, install it, run it, log into your Battle.net ID, and then finally install Overwatch 2 on Steam Deck from the Battle.net application.
If you're looking for in depth steps on how to play Overwatch 2 on Steam Deck then worry not as that's exactly what we're here to provide.
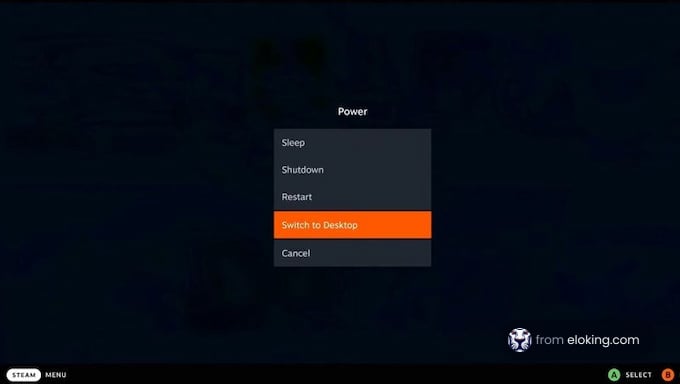
Step #1: Boot Your Steam Deck into Desktop Mode
Although in the past players had to download extra applications just to install Overwatch 2 on their Steam Deck, that isn't the case anymore. To start off, you'll want to boot your Steam Deck in desktop mode so you could download Battle.net.
If you don't know how to do this, it's simple. Simply:
Power on the Steam Deck.
Once powered on, hold the power button until a menu appears.
In that menu, you'll see an option to 'Switch to Desktop' which you have to select, prompting your Steam Deck to boot into desktop mode.
Struggling to win? Bad teammates?
Purchase a game with one of our PRO players.
One game
Average wait time <30 minutes
$4.00
$3.32 per game
Two games
Average wait time <30 minutes
$8.00
$3.00 per game
Three games
Average wait time <30 minutes
$12.00
$2.50 per game
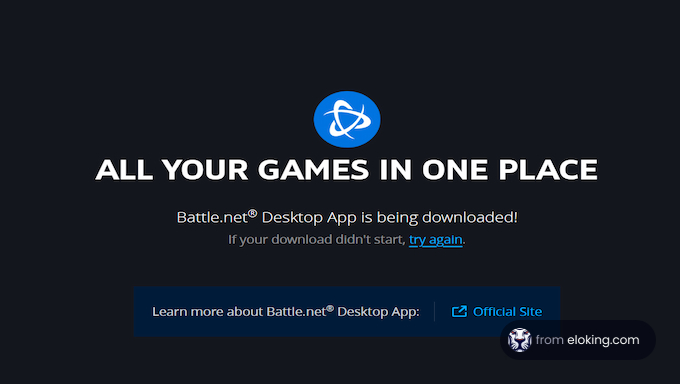
Step #2: Download the Battle.net Install File
Now that your Steam Deck is in desktop mode, you can open your browser and head on over to the official Battle.net website. From there, look for the option to download the Battle.net installer file to your device and click on it (the big blue button.)
Don't worry if the download file is the native Windows version as we have a workaround that'll allow you to install and run this download file with no problem.
Step #3: Add the File to Steam
With the Battle.net install file downloaded to your device, now you want to add it to Steam so you're able to run it on your Steam Deck despite it not being a native Steam game.
To do so:
First, click on the blue folder icon on your home screen (Dolphin file explorer.)
Then, go to downloads and look for the Battle.net install file that you just downloaded.
Press the left bumper to bring up a menu, where you'll see the option to 'Add to steam'. Click it.
With the file added to Steam, you now have to run the Steam application and head to the library. From here, search for the battle.net install file by typing it in the search bar, and when it shows up, use the left trigger on the .exe file to bring up another menu. This time, you want to click on the 'properties' option.
With the properties window open, click on 'compatibility' first, then look for a tick box toward the right of the window. Click in the tick box to force the use of a specific Steam Play compatibility tool, then select the latest Proton version.
Step #4: Install Battle.net
With all the permissions required to install Battle.net given, you just have to now back out of the properties window and click the blue 'play' option. Wait for a few seconds and the Battle.net installer should boot up.
If you've ever installed anything on your Windows device then you'll know exactly what to do at this point. Simply follow the on-screen instructions after which the application will automatically finish the installation and run on your device.
One thing to keep in mind, however, is that it might be worth downloading Battle.net in a location on your drive that's easy to access. Otherwise, you might have issues looking for the file location in the future. Additionally, if you aren't able to log in properly when asked to log in to your Battle.net ID, then you might have to switch your Steam Deck to gaming mode. Just remember to tap the 'remember me' option when logging in.
Step #5: Install Overwatch 2
That's right, folks. We're finally at the last step. With Battle.net running and you logged into your account, all you have to do now is install Overwatch 2 just as you would on any other device.
Click on Overwatch 2.
Click on Install.
Wait for the download and installation process to be complete.
That's it! Naturally, with this process, you can not only install and run Overwatch 2, but also any other game that requires Battle.net to run such as Hearthstone.
Extra Tip
There is more thing you can do to make running Overwatch 2 much easier in the future. Basically, remember how you added the Battle.net installer file to Steam? Well, now we recommend you do the same just with the .exe file you downloaded and installed.
We would usually recommend you directly add the Overwatch 2 .exe file to Steam, but there's one major downside to doing so. If you run Overwatch 2 directly from Steam, you'll be asked to enter your Battle.net ID credentials every single time, which, as you can imagine, is not fun.
FAQs
Yes! While Overwatch 2 isn't natively on Steam, you can install the Battle.net launcher in desktop mode, add it to Steam as a non-Steam game, and then download & play Overwatch 2!
In desktop mode, download the Battle.net installer. Then, use the Dolphin file explorer to 'Add to Steam'. Finally, in Steam, find the Battle.net installer and force compatibility with the newest version of Proton.
Power on your Steam Deck and hold the power button until a menu appears. Select 'Switch to Desktop' to enter desktop mode, which is needed to install Battle.net.
Ensure you've forced compatibility with the latest version of Proton in the Battle.net installer's properties within Steam. Also, try switching to Gaming Mode if you have login issues.
Install Battle.net in an easily accessible location on your Steam Deck's drive. This makes it easier to find the file location in the future if needed.
What’s next?
Ready to level up your gameplay and climb the ranks in Overwatch 2? Purchase our top-notch Eloking Overwatch 2 Boost now and dominate the competition like never before!
Purchase Overwatch 2 Boost
and start playing at the rank you deserve!


 Although in the past players had to download extra applications just to install Overwatch 2 on their Steam Deck, that isn't the case anymore. To start off, you'll want to boot your Steam Deck in desktop mode so you could download Battle.net.
 Now that your Steam Deck is in desktop mode, you can open your browser and head on over to the official Battle.net website. From there, look for the option to download the Battle.net installer file to your device and click on it (the big blue button.)
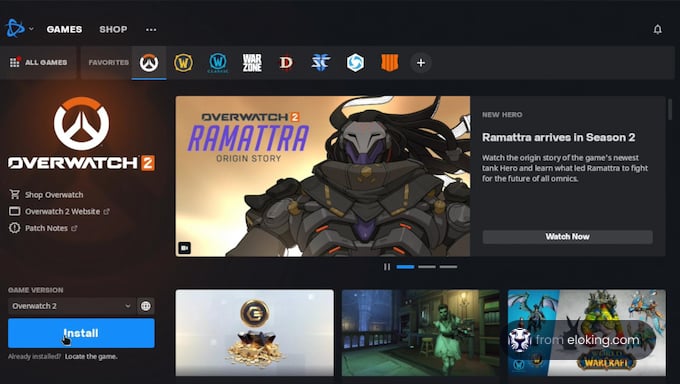 That's right, folks. We're finally at the last step. With Battle.net running and you logged into your account, all you have to do now is install Overwatch 2 just as you would on any other device.