Streamlined three-tier loyalty program where every member enjoys the same high-quality rewards, with benefits escalating at each tier.
Simple yet effective, this program stands as the best deal for Eloking's boosting services, ensuring maximum value and satisfaction for all our users.
Cashback on all Eloking boosts (3%, 5%, 7%)
Discounts for all Eloking boosts (5%, 10%, 15%)
Discount for a friend 🤗
Free daily lootbox spin with industry-leading rewards
Member exclusive season and event offers
Best Sova Lineups for Sunset in Valorant
j
Anthony King
Gamer
03 Feb 2026
Updated On
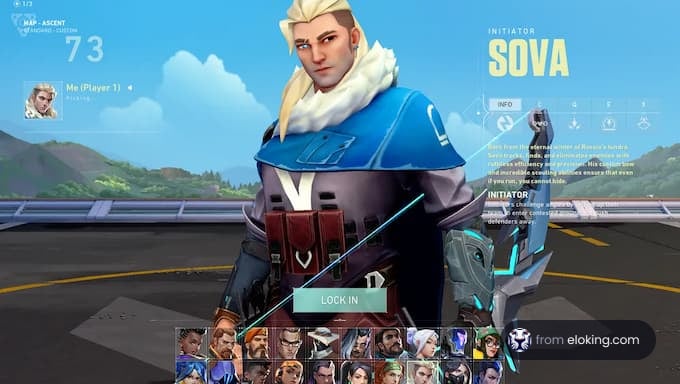
Sova is one of the best agents in Valorant to use if your aim is to set up good lineups for your teammates to take advantage of. However, in a relatively new and rather open map like Sunset, some players might struggle to find good lineups that can actually make a difference in the match, Well, that is if they haven't read this article.
Today, we're here to go through four of the absolute best Sova lineups for Sunset. Two of these lineups are for the A bombsite while the other two are for the B bombsite to ensure players have at least one lineup they can use for any scenario. The concept behind these lineups can also be used for other maps like Fracture and Bind.
So, without any delay, here are the best Sova lineups for Sunset in Valorant. To adeptly grasp these strategies and more, consider enlisting the expertise of a professional Valorant coach from Eloking. Additionally, relish an exclusive 20% discount by utilizing the code "BoostToday" for a comprehensive and tailored learning experience.
A Bombsite Lineups
Struggling to win? Bad teammates?
Purchase a game with one of our PRO players.
One game
Average wait time <30 minutes
$4.00
$3.32 per game
Two games
Average wait time <30 minutes
$8.00
$3.00 per game
Three games
Average wait time <30 minutes
$12.00
$2.50 per game
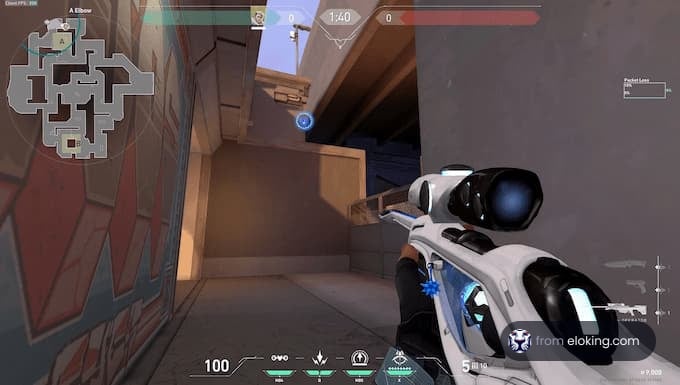
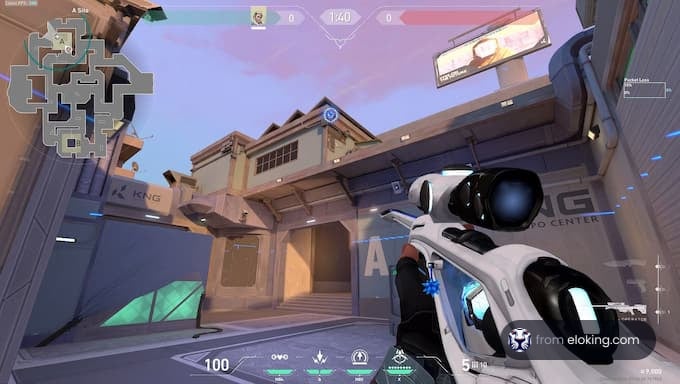
1) A-Lobby to A-Elbow
This recon lineup from A-Lobby to A-Elbow is a crucial tool for gaining information and identifying enemy positions at the onset of the round. By revealing potential threats near the A-Elbow entry to A-Site, you can better coordinate your team's approach and execute strategic plays.
Steps:
At the beginning of the round, position yourself in the corner of the barrier near Direct your gaze towards the A-Elbow wall, focusing on the tiny row of windows at the top.
Place your crosshair in the middle of the second window from the right.
Activate your recon dart ability with a full charge.
Fire your dart, ensuring it bounces only once.
The dart, propelled by a single bounce, gracefully lands on top of the wall near the A-Elbow entry to A-Site. This strategic placement allows the recon arrow to unveil any opponents holding angles in the A-Elbow vicinity. By executing this lineup early in the round, you provide your team with valuable intel, enabling them to make informed decisions and potentially catch opponents off-guard.
2) A-Lobby to A-Site
Post-barrier drop, this lineup from A-Lobby to A-Site allows you to gain comprehensive vision of A-Site, excluding A-Alley and areas directly below the ledge. It's an essential tool for planning your approach and countering enemy movements on A-Site.
Steps:
After the barrier drops, make your way to the corner near A-Lobby.
Tuck yourself into the wall, preparing for the lineup.
Focus your attention on the wall near the A-Elbow entry directly in front of you.
Align your crosshair on the wire so that the first bar charge lines up with the wall.
Use a single charge for your recon dart.
Fire the dart, allowing it to soar over the wall towards A-Site.
The recon dart lands directly on top of the wall on A-Site, revealing the majority of the area except A-Alley and players positioned directly beneath the ledge. This comprehensive vision empowers your team to make informed decisions and execute coordinated strategies, ensuring a higher likelihood of success in taking control of A-Site.
B Bombsite Lineups
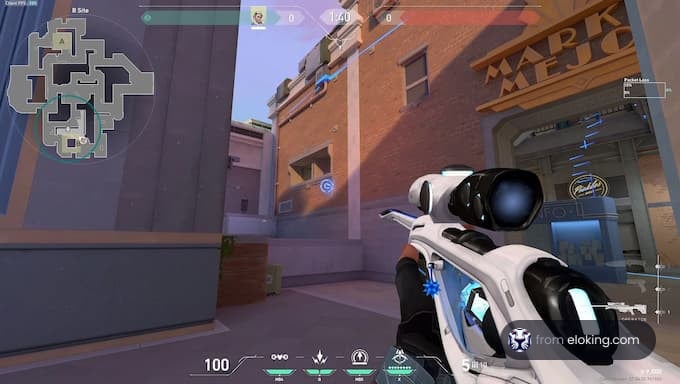
1) B-Main to B-Site
Securing control of B-Main on Sunset can be pivotal, and having the right recon lineup can unveil concealed opponents on B-Site. This Sova lineup is designed to expose lurking enemies and give your team a tactical advantage.
Steps:
Ensure your team has control of B-Main before attempting this lineup. Head to the corner highlighted in the image to maximize your line of sight towards B-Site.
Orient yourself towards the B-Site entry and locate the ledge. Place your crosshair on the tiny line present on the ledge, aiming as close to the border as possible.
With your crosshair in position, initiate a recon dart with a single bounce and a full charge. Release the dart confidently, watching it soar over B-Site and land on the wall near B-Market.
The chosen corner in B-Main provides a secure vantage point for deploying the recon dart, minimizing the risk of being detected by opponents. Aiming at the precise spot on the ledge ensures the dart's trajectory covers key areas of B-Site, revealing any adversaries attempting to hide or hold strategic angles.
This lineup is particularly effective for uncovering hidden threats near B-Market and can be instrumental in coordinating pushes or defending against aggressive enemy plays. As Sova, use this reconnaissance tool strategically to gather crucial information for your team and gain the upper hand in engagements on the Sunset map.
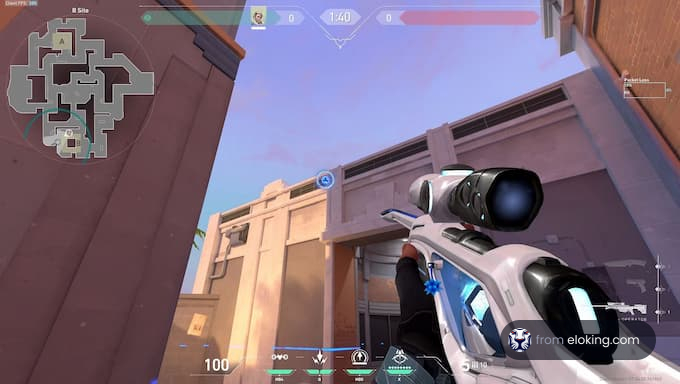
2) B-Lobby to B-Back Site
Securing control of B-Lobby is a pivotal moment in any B-Site assault. This recon dart lineup is crafted to reveal the entire B-Back Site, helping your team identify enemy positions and execute coordinated attacks.
Steps:
Position yourself near the blue box in B-Lobby.
Aim towards the sky.
Align your HUD line near the HP count on the ledge below the letter "E."
Fire your recon dart with two charges, directing it towards B-Site.
By aiming towards the sky and utilizing the HUD line for alignment, your recon dart will travel over the B-Site wall and land on top of the wall near B-Boba. This strategic placement provides comprehensive visibility into the B-Back Site, allowing your team to plan their approach, catch opponents off-guard, and potentially dismantle the defenders' setup.
FAQs
From A-Lobby, aim at the windows on the A-Elbow wall (second from the right). Full charge, one bounce. This reveals enemies near A-Elbow, crucial for early round info.
From B-Main, aim at the ledge towards B-Site. Line up your crosshair on the tiny line on the ledge. Use a full charge, one bounce to reveal enemies near B-Market.
After the barrier drops, go to A-Lobby and aim at the wire on the A-Elbow wall. One bar charge reveals most of A-Site except A-Alley and below the ledge.
Position yourself near B-Lobby and aim towards B-Back site. Use a recon dart to reveal enemy positions and coordinate attacks. (Full steps not included in blog post excerpt)
What’s next?
Take your Valorant gameplay to the next level and climb the ranks with ease - buy Valorant boost now!
Purchase Valorant Boost
and start playing at the rank you deserve!